To remove the background of a photo is not a difficult task. For simple as well as advanced editing we use Adobe Photoshop. Latest version of Adobe Photoshop have in-built “Refined Edge” tool. In this case we use a plugin called Extract for older versions up to CS5. This plugin specializes in removing the background from the foreground subject with edge to edge precision which makes it look unedited especially for portraits with messy hair.
Installation of Extract plugin:
- Download the plugin from any trustworthy websites. Copy “ExtractPlus” from the folder.
- Open the directory folder of Photoshop. Double click Plug-Ins folder, if you dont have one then create a new folder and rename it to “Plug-Ins”.
- Paste the copied file into the Plug-Ins folder, the Extract plug-in is now installed.
After installing the Extract plug-in, it is visible in the “Filter” drop down menu.
Using Extract
To remove a background from a portrait picture follow the following steps:
- Open a picture in Photoshop. Crop the picture and the image size is set as per the requirement.

- Click on “Filter” drop down menu and click on the newly added “Extract” option.
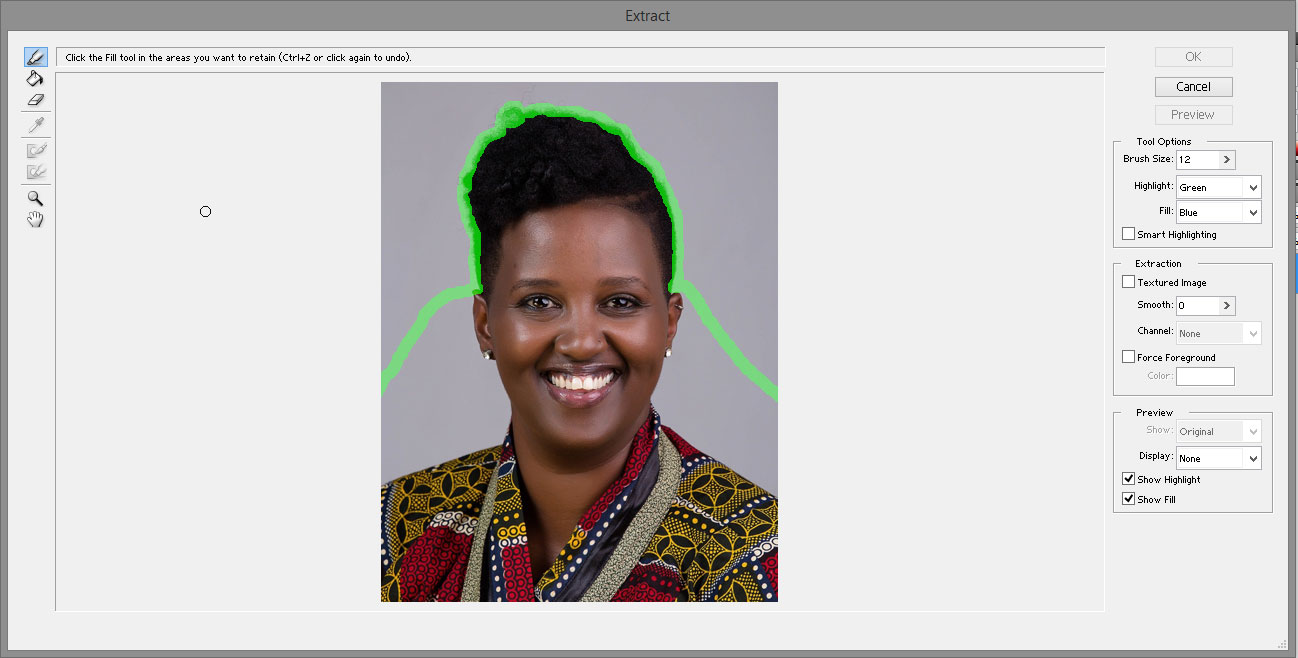
- A new window opens. Use the highlighter tool – increase or decrease the brush size as per the requirement (Tool options)
- Using the brush draw an outline through the edge of the hair (applicable when there is clear differentiation between hair and background).
- Move the brush to the starting point without touching the body parts as shown in the picture.

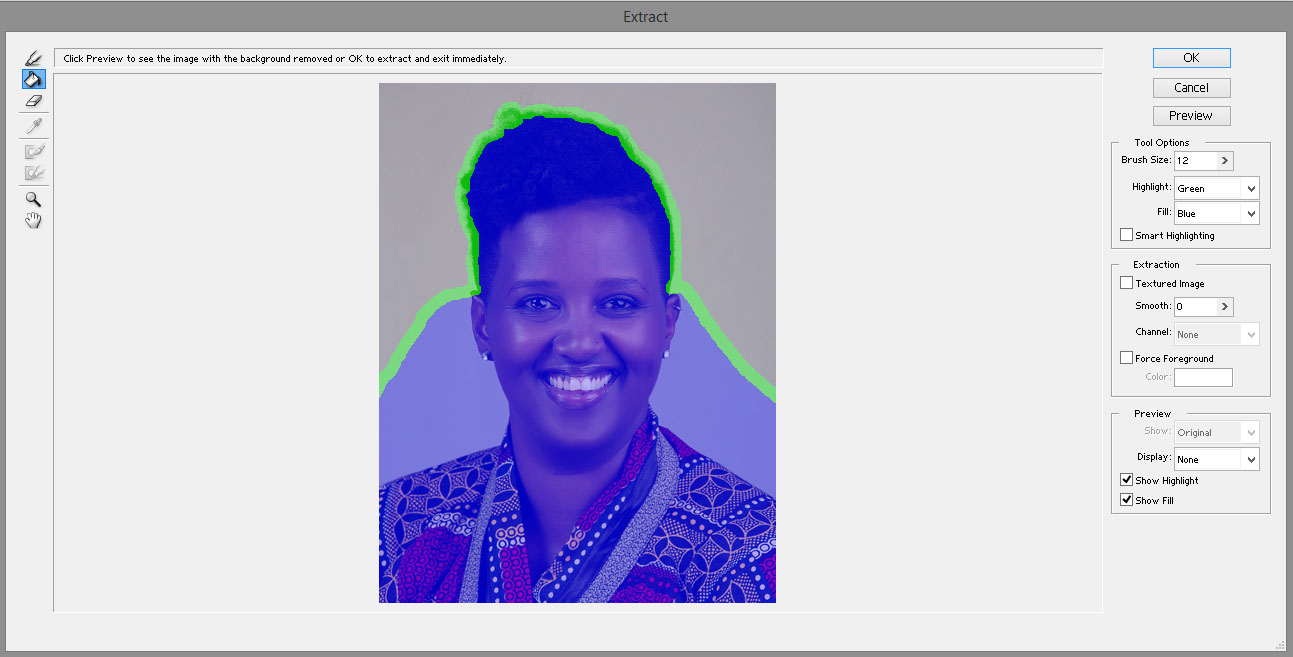
- Using the fill tool, fill the inside of the painted area by clicking. Click “Ok”

- Now the background pixels are all removed and found to be transparent area.
- Go to layer menu – click flatten from the top down menu.
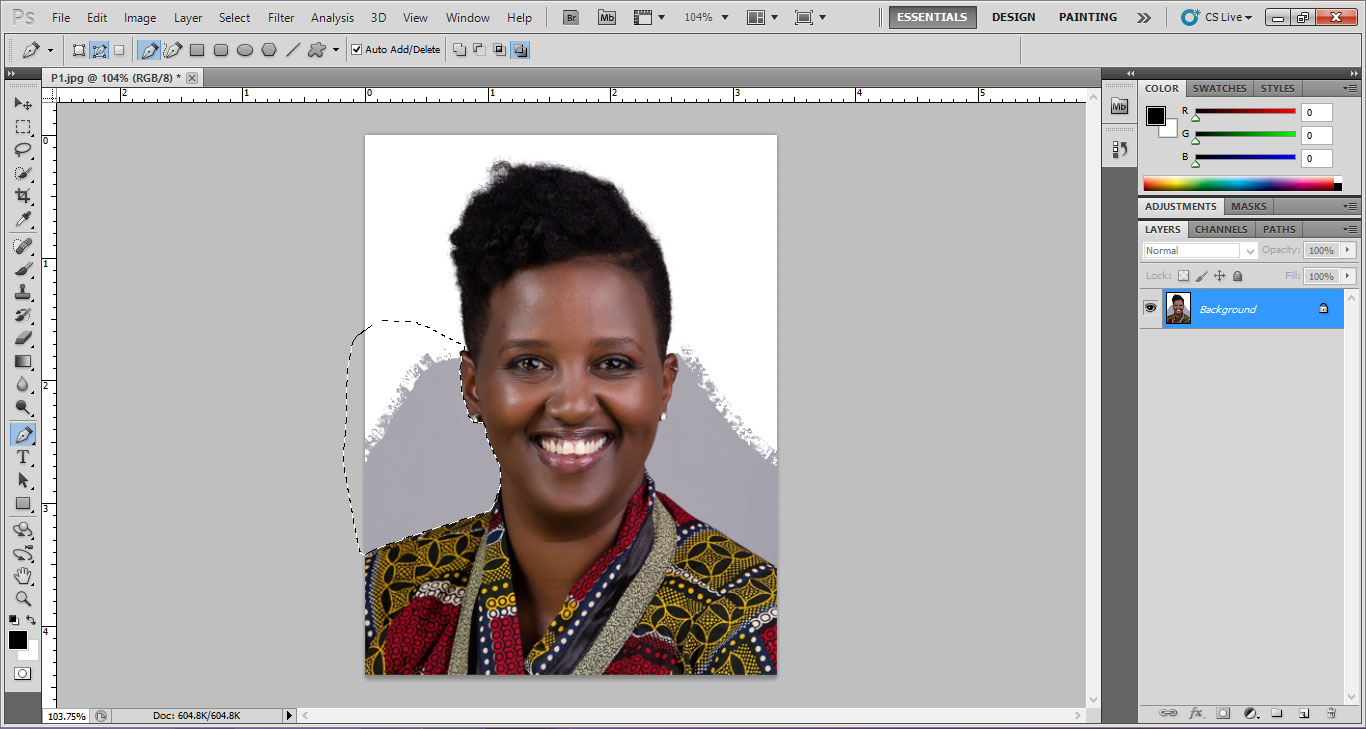
- Select the pen tool and draw outline through the edge of the ear, cheek, neck and body and close the path by clicking at the starting point. You can the see the selected path represented by a line.

- Keeping the selection of pen tool, right click – drop down menu appears.
- Click on “Make Selection” and a new window appears.
- Give the feather radius that range from 1-3 pixels depends upon the size of the image to make the edge smooth.
- Delete the selected path and fill it with default background colour white (D).

This plug-in is popularly used to make passport size photos with unwanted background to white giving it a natural appearance contrary to scissor cut method. This editing can be done quickly with the help of extract plug-in without wasting any time.
– Binoy Jayadevan
Photo courtesy – Pixabay